How to Teach Pickleball: Drills, Progression, Tips
24.3 million Americans play pickleball right now, and that number is growing by 15-20% every year. That means millions of people are picking up a paddle for the first time, and most of them are learning from a friend, a family member, or a volunteer at their local rec center. Not a certified instructor. Not a YouTube video. Someone like you.
At 11 PICKLES, we teach people how to play all the time. On the courts, at events, and through the content we publish for players at every level. We play every day, we train with pros, and we have introduced the sport to more friends, family members, and total strangers at open play pickleball sessions than we can count.
I have personally made every teaching mistake in the book: talking for 15 minutes about the history of the sport while my students stood there holding paddles they had not hit a ball with yet, overloading a group of beginners with kitchen rules before they could serve, and trying to teach dinking to someone who had touched a paddle for the first time 20 minutes earlier. The approach I use now is completely different, and it works.
This guide covers everything you need to teach pickleball effectively, whether you are running a formal clinic, coaching a PE class, leading a corporate event, or just helping a friend get started. I will walk through the exact teaching progression, 18 drills organized by skill, a minute-by-minute clinic structure, how to teach different demographics, common mistakes to avoid, and how to get certified if you want to turn this into a career.
What You Need Before You Start Teaching
Before you get anyone on the court, make sure you have the right setup. The equipment matters less than the teaching, but having the basics covered prevents distractions and keeps the session running smoothly.
Essential Equipment
- Paddles: One per student. Beginners do best with lightweight paddles (6.5-8.5 oz) for better control and less arm fatigue. If you are buying paddles for a group, check our best pickleball rackets for beginners guide. For individual students ready to invest in their own paddle, the Luzz Pro 4 Tornazo is excellent for developing control and feel (use code 11PICKLES for 15% off).
- Balls: Indoor balls (softer, larger holes) for indoor courts; outdoor balls (harder, smaller holes) for outdoor. Buy extra because they crack. Neon colors are easiest to see.
- Net: Standard height is 36 inches at the sidelines and 34 inches at the center. Portable nets work fine.
- Court shoes: Lateral support is critical. Check our best sneakers for pickleball guide. Running shoes do not provide the lateral stability pickleball demands.
- Cones or markers: For marking zones and drill stations.
- Whistle: For safety signals, especially with larger groups.
A basic beginner setup (entry-level paddle, pack of balls, court shoes) costs $100-$150 per person. For group teaching, wooden paddles are cost-effective for classroom use.
Court Setup
A standard pickleball court is 20 feet wide by 44 feet long. One tennis court can accommodate 2-4 pickleball courts. For beginners, use cones to clearly mark the pickleball kitchen rules line. It is the most important boundary for new players to understand.
Group Size
- Ideal ratio: 4-6 students per coach per court
- Maximum for beginner clinics: 8 players per court
- PE classes: Can accommodate larger groups by rotating players on and off the court
The Teaching Progression: What to Teach and in What Order
This is the most important section. The order in which you introduce skills matters enormously. The biggest mistake I see people make when teaching pickleball is starting with rules. Do not start with rules. Start with hitting the ball.
The First 20 Minutes
Six things to do:
- Learn names quickly. Essential for safety. You need to get someone's attention from across the court.
- Establish safety protocols. Create a stop signal (whistle), define court spaces with cones, explain ball-rolling hazard response.
- Gather health information privately. Ask about limitations without requiring full medical histories.
- Start hitting immediately. Students prefer hands-on play over instructor demonstrations. Let them experience the ball.
- Use "throw pickleball" first. Have students throw and catch the ball to develop hand-eye coordination and movement before introducing paddles.
- Isolate single skills. Teach one concept at a time. Reinforce success. Then layer new skills progressively.
Five things to avoid:
- Do not start with game history. Nobody needs to know why is pickleball called pickleball before they learn to serve.
- Do not overwhelm with rules. Start with just three: get the ball over the net, one bounce or none allowed, and out-of-bounds.
- Do not lead with technique instruction. Let students hit first, then they will be motivated to improve.
- Eliminate shadow swings. There is virtually no skill transfer between pretending to hit a ball and actually hitting one.
- De-emphasize scoring initially. Pickleball scoring confuses beginners. Use simple rally scoring (every point counts) and focus on ball control.
The Full Teaching Progression
Follow the natural sequence of game situations. Each step builds on the last:
- Step 1: The Serve. Begin here because it gives beginners a full swing with a clear target. Teach the drop serve first; it is more forgiving than the volley serve. The ball is dropped (not thrown) and hit after the bounce. The key points are: underhand, below the waist, paddle below the wrist, diagonal to the opposite service box. For the full breakdown, see how to serve in pickleball for beginners.
- Step 2: Return of Serve. Teach that the ball must bounce before the receiver hits it. Emphasize hitting returns deep toward the opponent's baseline. The gold standard is a return that is not hit too hard, maybe even looped a bit, as long as it lands deep.
- Step 3: The Two-Bounce Rule. This is the hardest rule for new players to grasp. After the serve, the return must bounce before the serving team hits it. After the return, the serving team's third shot must also bounce before the receiving team can hit it. Once both bounces have happened, either team can volley or play off the bounce.
Call it the "two-bounce rule," not the "double bounce rule." The official name changed to avoid confusion with a ball bouncing twice on the same side. For a full explanation, see the double bounce rule in pickleball.
- Step 4: Rally Play. After the third shot, allow continuous play until a fault occurs. Casually mention kitchen rules without formal instruction yet. Let people play.
- Step 5: Kitchen Rules. Introduce the non-volley zone rules only after players have basic rally skills. You cannot hit a volley while standing in the kitchen or touching the kitchen line. You can enter the kitchen to play a ball that has bounced.
- Step 6: Dinking. Teach what is dinking in pickleball only after players have adequate ball feel. A dink is a soft shot that lands in the opponent's kitchen. Practice dinks to 25 before anyone speeds up. Focus on relaxed grip and controlled contact.
- Step 7: Third Shot Drop and Drive. This is the most advanced beginner skill. The third shot drop separates beginners from intermediate players. The ball should be on its downward arc as it crosses the net. Do not rush to teach this before basic rallying is solid.
- Step 8: Positioning and Strategy. In doubles, both partners move together as a unit, staying within about 10 feet of each other. After serving, stay back. After returning, move up to the kitchen line together. The goal is both players at the kitchen line as fast as possible.
Scoring
Introduce scoring last. There are two systems:
Traditional scoring: Games to 11, win by 2. Only the serving team can score. Score is called with three numbers: serving team's score, receiving team's score, server number (1 or 2). At the start, the first serving team gets only one server (start at 0-0-2).
Rally scoring (2026 provisional): A point is scored on every rally. Games typically to 11 or 15, win by 2. New for 2026: the game-winning point can now be scored by either team. Rally scoring is simpler for beginners and I recommend using it during teaching sessions.
18 Drills for Teaching Pickleball
Here are the best drills organized by skill level. These come from experienced instructors and work for groups of any size. For more drill ideas, check out pickleball drills and pickleball practice at home.
Groundstroke Drills
- Drop and Hit (Solo): Drop the ball, let it bounce, hit at peak height. Builds hand-eye coordination.
- Forehand to Forehand (2 players): Rally cross-court hitting forehands only. Then switch to backhands.
- Cross-Court Rally (2 players): Hit diagonal groundstrokes. Maintain the rally as long as possible.
- Switch Sides (2 players): Play a game switching sides after every shot. Fixes flat feet.
Serve and Return Drills
- Serve to Target (Solo): Choose a specific spot on the court and practice serving to it repeatedly.
- Serve and Catch (2 players): One player serves, the other catches (does not hit). Isolates serve practice.
- Serve-Return-Catch (2 players): Server serves, receiver returns, server catches the return. Practices both skills in sequence.
- Deep Returns (2 players): Partner serves; return the ball aiming to land one foot before the baseline.
- Serve and Split Step (2 players): Serve, then perform split-step hops from baseline toward the kitchen. Builds transition footwork.
Dinking Drills
- Dink Aim (Solo): Set up cone targets in the kitchen. Hit each with soft dinks. Builds muscle memory.
- Dink to 25 (2 players): Dink back and forth cross-court. Count to 25 before anyone is allowed to speed up.
- Two Up, Two Back (4 players): Two players at the kitchen dink; two at the baseline. Baseline players move up when the ball gets past the kitchen players.
Third Shot Drop Drills
- Wall Drops (Solo): Set a 3-foot obstacle 10-12 feet away. Arc the ball over it. Develops precision.
- Return and Drop (2 players): Partner hits a groundstroke; respond with a drop shot into the kitchen.
Volley Drills
- Toss Up (Solo): Stand near the net, toss the ball between hands. Improves reaction time and soft hands.
- Volley Spot (2 players): Hit volleys from the kitchen line, then move back to the baseline and repeat. Builds control at different distances.
- Back and Forth (2 players): Volley with a partner, gradually moving further apart.
Full Game Drill
- Mini-Games (4 players): Play rally scoring to 5. Quick games keep energy high and give everyone frequent reps.
How to Run a Beginner Clinic
Here is a minute-by-minute structure for a 90-minute intro clinic that I have refined through trial and error. This works for groups of 4-8 players.
90-Minute Clinic Structure
- 0-5 min: Welcome, learn names, safety protocols, quick health check
- 5-10 min: Brief court orientation (point out kitchen, baseline, net height)
- 10-25 min: Throw pickleball (no paddles) to develop hand-eye coordination and movement
- 25-40 min: Introduce paddles, serve practice (drop serve first)
- 40-55 min: Return of serve practice (serve-return-catch drill)
- 55-70 min: Rally play with basic rules (get it over the net, two-bounce rule)
- 70-85 min: Mini-games (rally scoring, first to 5)
- 85-90 min: Wrap-up, Q&A, next steps
Time split: 60% active drilling, 40% situational gameplay. People came to play. Let them play.
4-Week Beginner Series
If you are running a multi-week program:
- Week 1: Serve and return of serve
- Week 2: Dinking and kitchen rules
- Week 3: Third shot drops and volleys
- Week 4: Guided gameplay and positioning strategy
Teaching Different Demographics
Not everyone learns the same way. Here is how to adapt your approach based on who you are teaching.
Teaching Kids and Youth
Keep it moving. Kids lose focus during long explanations. Use games, competitions, and challenges (serve accuracy contests, rally streaks, fastest to 5 points). Simplify rules to the bare minimum. Make it social and fun first, technical second. USA Pickleball has standard junior divisions (12U, 14U, 18U), and all junior events are co-ed.
Teaching Seniors
Patience and safety first. Start with a thorough warm-up (10-15 minutes of dynamic stretches). Use lighter paddles to reduce arm fatigue and joint stress. Emphasize footwork and balance over power. Be mindful of hearing and vision limitations. Consider wrist guards for players with reduced bone density. Read how to prevent pickleball injuries for more on keeping older players safe on the court.
Teaching Tennis and Racquetball Players
These players already have racket sport fundamentals, but pickleball requires different instincts. Focus on four things:
- The compact swing. They will swing too big. Pickleball rewards shorter, more controlled strokes.
- The soft game. Dinking feels unnatural to power hitters. They need to learn that soft shots win rallies.
- Kitchen rules. The non-volley zone does not exist in tennis. See pickleball kitchen rules for the full breakdown.
- The two-bounce rule. Tennis players instinctively rush the net after serving. In pickleball, they have to stay back.
Do not skip the basics just because they are athletic. Their tennis habits are the biggest thing they need to unlearn. For a detailed comparison, check out difference between pickleball and tennis.
Teaching Corporate Groups
Keep it short (90-120 minutes total), fun, and social. Spend 30-45 minutes on basic instruction, then move to casual play with rally scoring. Create teams for round-robin mini-tournaments. Emphasize fun over technique. Have food and drinks available. This is team building, not training camp.
Teaching PE Classes
Work within 45-60 minute class periods. Rotate players on and off the court. Use cones and tape to set up multiple courts (one tennis court fits 2-4 pickleball courts). Wooden paddles are cost-effective for classroom use. Start with throw-and-catch games before introducing paddles. USA Pickleball has an educator portal with free lesson plans.
Common Teaching Mistakes and How to Fix Them
These are the mistakes I made when I first started teaching, and the ones I see other instructors make every week.
13 Beginner Mistakes Your Students Will Make
- Staying in no man's land. Standing between the baseline and kitchen line. Fix: get up to the kitchen line after the serve and return are done.
- Hitting to the opponent's forehand. Most players are weaker on their backhand. Fix: target the backhand.
- Scooting up after serving. The two-bounce rule requires staying back. Fix: stay at the baseline after serving.
- Getting too fancy with spin shots. High risk, low reward for beginners. Fix: focus on consistency first.
- Using only power. Hard shots carry high risk. Fix: balance power with soft shots and dinking.
- Not taking center-court shots as the forehand player. Fix: the dominant forehand player takes all middle balls. Communicate.
- Not sprinting to the kitchen. Fix: get there as fast as possible after the return.
- Poaching when not necessary. Fix: only poach shots your opponent cannot recover from.
- Hitting shots you have not practiced. Fix: stick to what you know. Build fundamentals first.
- Attempting smashes on low balls. Fix: push the paddle forward instead of swinging down.
- Returning power shots too hard. Fix: block with the paddle and let the ball's momentum work for you.
- Gripping the paddle in the palm. Fix: use the continental grip where the V of your thumb and index finger sits on the top bevel.
- Failing to communicate in doubles. Fix: talk constantly. Use "mine," "yours," and "switch."
Teaching Mistakes to Avoid
- Talking too much. Beginners want to hit balls, not listen to lectures.
- Teaching everything at once. One skill at a time. Layer progressively.
- Starting with scoring. Scoring is confusing. Save it for later.
- Correcting every mistake. Pick the most impactful fix and focus on that. Too many corrections overwhelm students.
- Not letting students play. The best learning happens in live play, not drills.
Solo Training Tools for Teaching
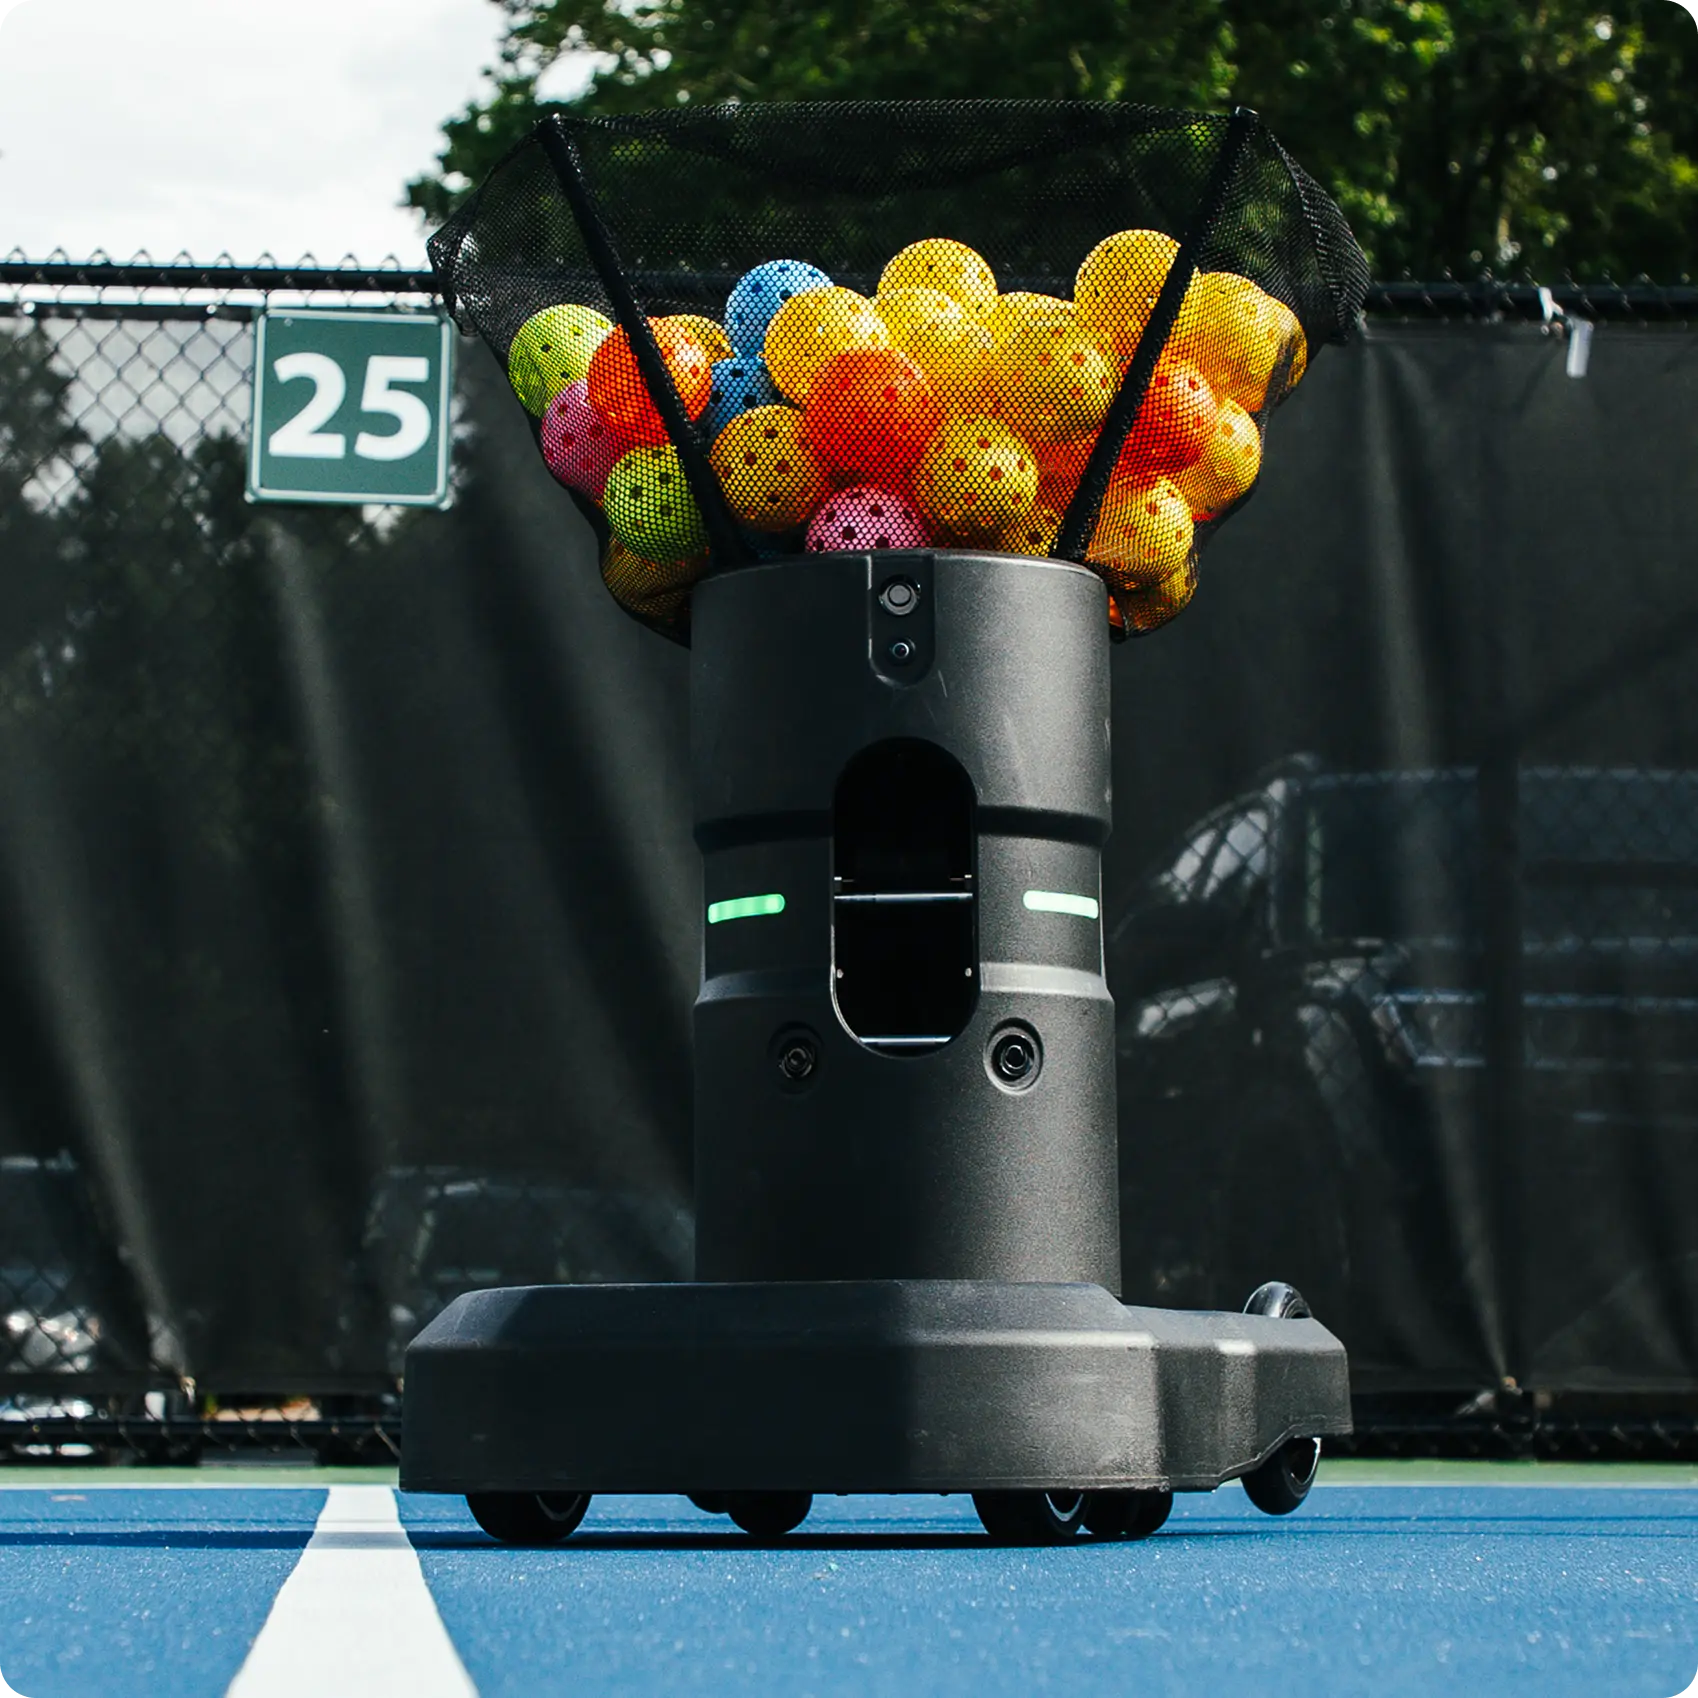
If you are teaching regularly, having a ball machine changes the game. The Tennibot pickleball machine is an AI-powered pickleball ball machine that lets you program custom drills, vary spin and placement, and adjust difficulty from beginner to tournament level. I use it to demonstrate specific drills before having students try them live. It is also invaluable for students who want to practice between lessons without a partner.
Save $50 with code 11PICKLES on the Tennibot Partner.
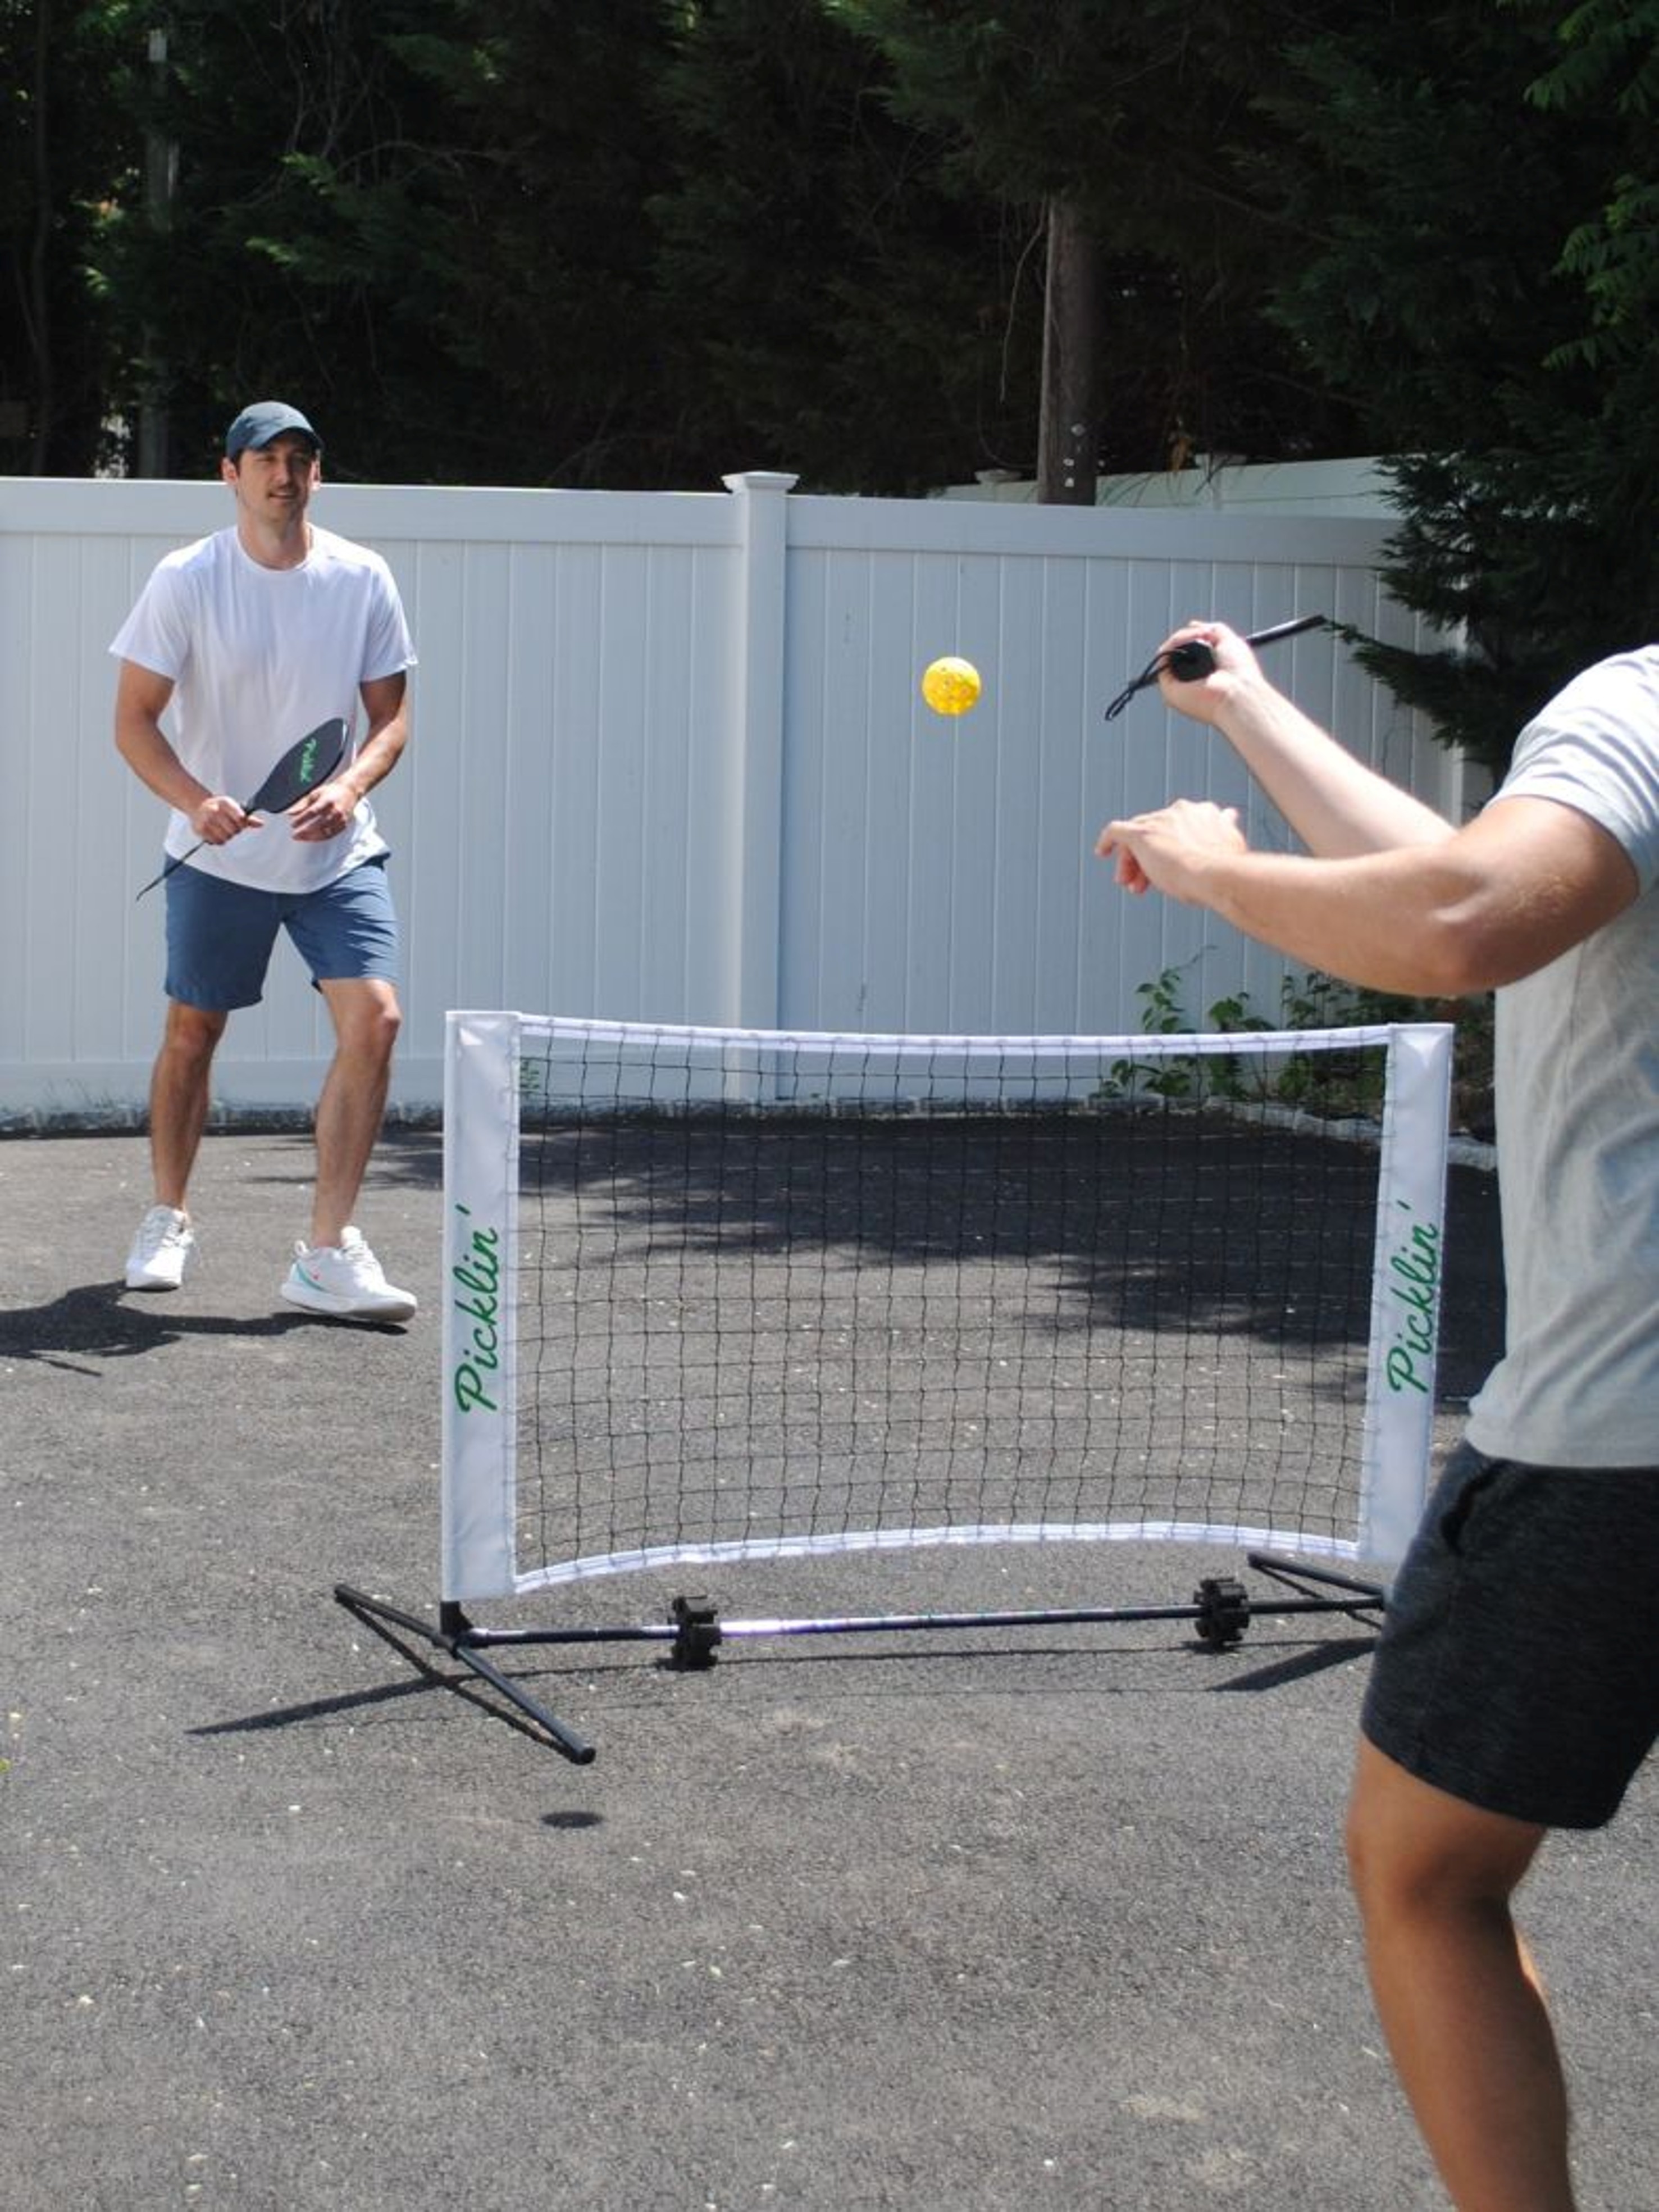
For softer game practice, the Picklin Mini Training Net is a compact rebound net students can use at home for dink practice (use code 11PICKLES for 10% off).
How to Become a Certified Pickleball Instructor
If you love teaching and want to make it official, or even build a career around it, there are several certification paths. Instructor demand is growing fast as the sport adds millions of new players every year. The average certified pickleball instructor earns approximately $49,000 annually, with top earners making $84,000+.
Certification Options
- PPR (Professional Pickleball Registry): $317 membership. Comprehensive certification covering technique, tactics, and teaching methodology.
- IPTPA (International Pickleball Teaching Professional Association): $250-$390 depending on level. Multiple tiers from beginner instructor to master professional.
- PCI (Pickleball Coaching International): $149-$329 for online certification. Flexible, self-paced option.
- RacketPro/DUPR: $199-$600. Integrated with the DUPR rating system.
All certifications require passing written and practical exams. Most include continuing education requirements to maintain your credential. Each has different strengths, so research which aligns with your goals.
If you are just getting started with pickleball yourself, build your foundation before teaching others. Start with pickleball 101, pickleball for beginners, or pickleball rules for dummies. For intermediate skills, check out how to beat bangers in pickleball and how to keep the ball low in pickleball. Students who want to practice at home can use our guides on pickleball at home and practice pickleball at home.
And 11 PICKLES, if you are teaching and want to rep the pickleball lifestyle while you do it, check out our Etsy shop for gear that looks good on and off the court. Subscribe to the 11 PICKLES newsletter for strategy content, beginner guides, and everything happening in the sport. We are here for all of it.
Transparency is key in pickleball and life. Some links on this site are affiliate links, which means if you click and make a purchase, we earn a small commission. It doesn't cost you extra, and it helps us keep serving up great content for the pickleball community.
What Is the Best Way to Teach Pickleball to Beginners?
Start with hitting, not rules. Let beginners throw and catch the ball first to develop hand-eye coordination, then introduce paddles and the serve. Teach the two-bounce rule and kitchen rules only after players can rally. The ideal group size is 4-6 students per instructor, and a 90-minute intro clinic covers the essentials.
What Should I Teach First in Pickleball?
Teach the serve first. It gives beginners a full swing with a clear target and starts the natural game sequence. Then teach the return of serve, the two-bounce rule, rally play, kitchen rules, dinking, and finally the third shot drop. Scoring should be introduced last because it confuses beginners and slows down learning.
How Do I Become a Certified Pickleball Instructor?
There are four main certification paths: PPR ($317), IPTPA ($250-$390), PCI ($149-$329 online), and RacketPro/DUPR ($199-$600). All require passing written and practical exams. The average certified instructor earns approximately $49,000 annually, with top earners making $84,000 or more.
How Long Does It Take to Learn Pickleball?
Most beginners can learn the basic rules and rally within a single 90-minute clinic. Developing consistent serves, returns, and kitchen play typically takes 2-4 weeks of regular practice. Intermediate skills like the third shot drop and strategic positioning develop over 2-6 months depending on how often you play.
What Equipment Do I Need to Teach Pickleball?
Essential equipment includes one paddle per student (lightweight, 6.5-8.5 oz for beginners), indoor or outdoor balls (buy extra), a net (34 inches at center), court shoes with lateral support, and cones for marking zones. A basic beginner setup costs $100-$150 per person. For group teaching, wooden paddles are cost-effective.